
Dolby Atmos Stems: What They Are and How to Prepare Them
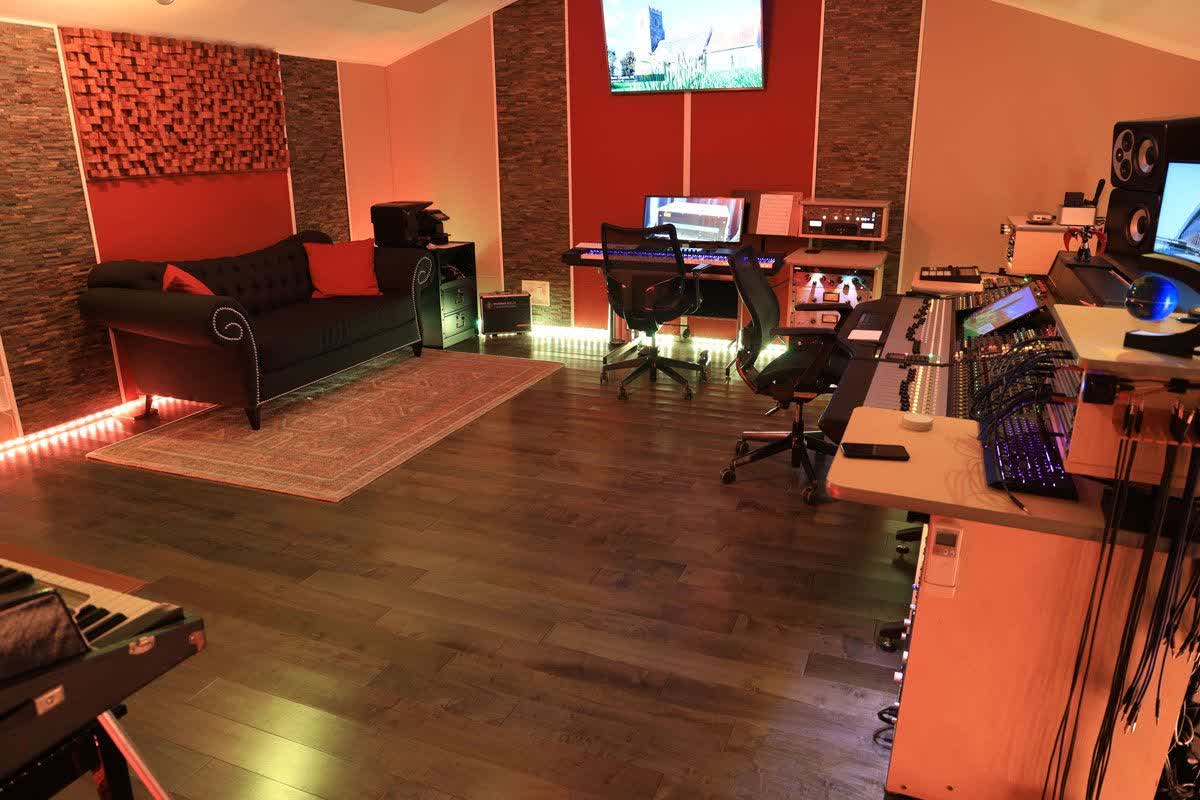
Most of the problems I run into on a Dolby Atmos job have nothing to do with the mix itself. They come from the files. A stem that starts two bars late, a vocal with the reverb baked in, a bus limiter left on the drums, a sample rate that does not match the rest of the session. Each one costs time before the creative work can even begin. This is the checklist I would give any artist, producer or label before sending a song to RG Studio, my room in Los Angeles. It is the same discipline Humberto Gatica and I needed when we mixed the Michael Jackson catalog in Dolby Atmos: the files have to be right before the room can do its job.
What are Dolby Atmos stems?
Dolby Atmos stems are the separate audio files of a song, such as drums, bass, lead vocal, backing vocals and effect returns, that an engineer places one by one in the three-dimensional space of a Dolby Atmos mix. Played together from the same start point, they add up to the song, and the Atmos mix is built from them, not from the finished stereo file.
In a stereo mix, stems are a convenience. In Dolby Atmos they are the raw material. Atmos does not take a finished stereo file and spread it around; the mix is built by placing each element in a 7.1.4 space, as part of the bed or as an object that can move. So when people talk about “Dolby Atmos stems”, they usually mean one of two things: the stems a producer sends to an Atmos mix, which is what most of this article is about, or the separate elements of an Atmos song they are already listening to, which is the next question.
Can you get Dolby Atmos stems from Apple Music?
No. What Apple Music, or any other streaming service, sends to your phone is the finished Atmos mix, encoded for playback and protected like any other track in the catalog. The separate instruments that went into the session are not inside that stream, so there is nothing to extract. Stem-separation software works on what it hears, the same way it does on a stereo file: it guesses the parts, it does not recover the originals. The real stems live with whoever owns the recording: the artist, the producer or the label. If you need them for a remix, a cover or a new Atmos version, they are the ones to ask, and the rights come with the files.
Why stems matter more in Atmos than in stereo
In a stereo mix, everything ends up between two speakers, so a little reverb printed on a guitar or a slightly glued drum bus is usually fine. In Atmos, every element can live in its own position in a 7.1.4 space, and the effects can live somewhere else entirely. A vocal can sit in front of you while its reverb opens up above and behind you. That only works if the reverb arrives as its own file. The more separated and cleaner the stems are, the more choices I have, and the less the Atmos version sounds like a stereo mix played louder.
The stem checklist
1. Format: 48 kHz, 24-bit WAV
Send uncompressed WAV files at 48 kHz and 24-bit. That is the rate most Atmos sessions and deliveries run at. If the song was recorded and mixed at 96 kHz, send 96 kHz; Apple accepts both. What you should not do is convert sample rates on export, send MP3s or mix 44.1 kHz and 48 kHz files in the same delivery. Every stem must share the same sample rate and bit depth.
2. Everything starts at the same point
Every stem must start at exactly the same position, ideally bar 1 or a clearly marked session start, even if the instrument does not play until the second chorus. Silence at the beginning of a file is not wasted space: it is what lets me drop forty files into a session and have them line up without guessing. Export the full length of the song, including the reverb tails at the end.
3. Print the processing that is part of the sound
If a guitar sound is the amp simulator, the EQ and the compression, print it. If the synth only exists through a chain of plugins, print it. I do not need to rebuild your sound design; I need to place it. Automation that defines the arrangement, like a filter sweep or a vocal ride, should also be printed.
4. Send dry and wet where it matters
For the elements that carry the song, especially the lead vocal, send two versions: one dry, with its EQ and compression but no time-based effects, and one with the effects as you had them in the stereo mix. The wet version tells me what you loved. The dry version lets me rebuild that feeling in the room.
5. Effect returns as separate stems
Reverbs and delays should come as their own stems: the vocal plate, the drum room, the slap delay on the guitar. In Atmos, the return of a reverb is one of the most expressive things to place, and it is impossible to pull it back out of a source once it has been printed together.
6. As much separation as makes sense
The ideal delivery is the full multitrack session. If you are sending stems, think in terms of what someone might want to move independently: kick, snare, toms, overheads, bass, each main guitar, keys, pads, strings, brass, lead vocal, doubles, backing vocals, ad-libs, percussion. A stereo “band” stem and a stereo “vocals” stem do not give an Atmos mix much to work with.
7. No limiting on the stems
Switch off anything on the master bus before you export: limiters, clippers, mastering EQ, stereo wideners. Stems printed through a master chain carry its pumping and its ceiling, and they will not add back up cleanly. Leave headroom on each file and do not normalise them.
8. Clear names
Name each file with the song, the element and the version, for example SongTitle_LeadVox_Dry.wav and SongTitle_LeadVox_Wet.wav. Avoid “Audio 14” and “Bounce final final 2”. Put each song in its own folder.
9. Include the approved stereo master
Send the approved stereo master as the reference, along with its exact length. The Atmos version has to match it: same length, same edits, same fades, same sync. On the Michael Jackson records, which were recorded and mastered on analog tape, lining the Atmos up with the released stereo was the most time-consuming part of the job. On a modern session, a stereo reference exported from the same start point makes it simple.
10. Session notes
A short text file saves a lot of back and forth: tempo and any tempo changes, key, the original DAW, the sample rate, and two or three lines about what matters in the song. “The bass and the kick are the record” or “the backing vocals should feel like a choir around you” tells me more than any spec.
11. Check it before you send it
Open an empty session, import every stem at the same start point and press play with all faders at zero. It should sound like the stereo mix, minus the master bus processing. If something is missing, late, doubled or distorted, you will hear it in a minute, and you will save a day.
What Apple Music asks for in Spatial Audio
If the goal is Spatial Audio on Apple Music, the final Atmos master has to meet Apple’s own rules. According to Apple’s video and audio asset guide and the Apple Music for Artists guide to Spatial Audio:
- The master is delivered as an ADM BWF file (Broadcast Wave Format with Audio Definition Model metadata).
- Audio is 24-bit at 48 kHz or 96 kHz.
- Integrated loudness must not exceed -18 LKFS, and true peak must not exceed -1 dBTP.
- The Atmos mix must be created from multitracks or from stems made from multitracks. Mixes generated from mono or stereo, and upmixes of a stereo release, are not allowed.
- The Atmos files must be conformed and synced to the stereo reference.
- Delivery goes through a distributor or encoding house approved for Dolby Atmos. Distributors publish their own upload steps, such as DistroKid’s guide to uploading a Dolby Atmos mix, so check yours before you book the mix.
There is also a business reason to care. Apple has said that streams of music available in Spatial Audio receive a greater share of sound-recording royalties on Apple Music, by a rate of up to 10%, according to Apple Music for Artists. The exact terms are Apple’s and can change, so check them with your distributor or label.
The loudness and delivery side is my job at the end of the mix. The stems are yours, and they decide how far that mix can go.
What if you only have the stereo file?
It happens more often than people think, especially with older releases. A stereo master can be spread around the speakers with upmixing tools, but that is not an Atmos mix, and Apple will not accept it as one. I go through why, and what the rules say, in can you convert a stereo song to Dolby Atmos? The first step is always to look for the multitrack: the label, the producer, the original studio, an old hard drive. If the session exists, even partially, there is usually a way. I explain the options, and what they mean for the budget, in how much a Dolby Atmos mix costs.
Who mixes the stems in Los Angeles
RG Studio is my own facility in Los Angeles, built around a 48-input AMS Neve Genesys Black console and a Genelec 7.1.4 system calibrated with GLM every morning, so what you hear in the room translates to headphones, cars and soundbars (for headphones, the distance of every element is set with the binaural render mode). With Humberto Gatica I engineered the Atmos versions of Off the Wall, Bad, Dangerous, HIStory and Invincible. Artists and labels can attend in person or send their stems from anywhere. For more about the room and the work, read Dolby Atmos Mixing Engineer in Los Angeles.
Frequently asked questions
What are Dolby Atmos stems?
Dolby Atmos stems are the separate audio files of a song, such as drums, bass, lead vocal, backing vocals and effect returns, that an engineer places one by one in the Atmos space. The Atmos mix is built from them, not from the finished stereo file.
How do I prepare stems for a Dolby Atmos mix?
Export every element as an uncompressed 24-bit WAV at the session’s sample rate (48 kHz in most cases), all starting at the same point. Print the processing that is part of the sound, send reverbs and delays as separate returns, leave limiters off, name each file clearly and include the approved stereo master as a reference.
How do I get the Dolby Atmos stems of a song on Apple Music?
You can’t download them from Apple Music. The stream is the finished Atmos mix, encoded for playback, and the separate instruments are not in it. The original stems belong to the artist, producer or label, and they are the only ones who can share them.
What sample rate should stems be for a Dolby Atmos mix?
48 kHz at 24-bit WAV is the safest choice, because it is the rate most Atmos sessions and deliveries run at. 96 kHz is fine if the song was recorded that way. What matters most is that every stem shares the same sample rate and bit depth, and that nothing has been converted on the way out.
Should my stems include effects like reverb and delay?
Print the processing that is part of the sound, but send the reverb and delay returns as their own stems. For the lead vocal and other key elements, send a dry version and a wet version. In Atmos, effects are placed in the room separately from the source, so having them apart is what lets the mix open up.
Can you make a Dolby Atmos mix from a stereo file?
Not one that Apple Music will accept. Apple requires Atmos mixes to be built from multitracks or from stems created from multitracks, and does not allow upmixes of a stereo release. If only the stereo master survives, the first step is to look for the original session or stems.
What file does Apple Music need for Dolby Atmos?
An ADM BWF master at 24-bit, 48 kHz or 96 kHz, with integrated loudness no higher than -18 LKFS and true peak no higher than -1 dBTP, conformed and synced to the stereo version. It is delivered through a distributor or encoding house that supports Dolby Atmos.
How many stems do I need for a Dolby Atmos mix?
There is no fixed number. As a rule, every element you might want to place or move on its own should be its own stem: kick, snare, bass, main guitars, keys, lead vocal, backing vocals, and each effect return. A dense production can easily reach several dozen; the full multitrack session is even better.
Ready to send your stems? Tell us about your project on the RG Studio page.